“Everyone eats.” Food is synonymous with memory, Don’t believe me? Watch the climax from Ratatouille. It’s indicative of all cultures. Witness that in action by throwing on Parts Unknown: you’ll notice most of the conversations take place around a table layered with local food and drink. Whatever your relationship is to food, one thing remains clear: food is universal.
Social media has made sharing our experiences with food transparent and intimate. I’ve been the guy taking pictures of dishes at restaurants, and I’ve also been the one making fun of the person standing on the chair to get a better angle of their plate.
Food photography has exploded over the last ten years. One of the most popular Instagram hashtags on the topics, #foodporn has 167 million posts.
Say it with me, PRE-PRO-DUCTION
If you’re a food brand, kitchen supplier, or even a blogger, how do you stand out in a room that is over crowded and over saturated?
To quote the U.S. Military, “Proper planning and preparation prevents piss poor performance.”
One key component to food photography is creating an atmosphere or mood. You are dictating how the viewer sees your photo, and the emotions you want to conjure. Think back to the Ratatouille moment, when feared food critic Anton Ego is served ratatouille. Upon taking his first bite he is transported back to his childhood, eating a bowl of his mother’s ratatouille. Hence the movies name.
You want to invoke a feeling or a reaction, as you would with any image. We all have deep personal attachments to food: this is your opportunity to dig into that, not just for the viewer but yourself.
Instagram and Pinterest are wonderful places to start. You can create mood boards, and save posts to reference. Consider other mediums of art. See how you can apply the style of stark contrasts of Chiaroscuro paintings to food photography or the color theory of Basquiat and Keith Haring to your images.
Wherever you pull your inspiration from, keep it on hand when you shoot. Give yourself something to constantly look at and examine as you go through your images. It could be in the form of a tear sheet, mood board, whatever you’re comfortable with. Just make sure to have it handy!
The Day Of The Shoot
When it comes to production, you’re going to need two things, a food stylist and a chef. In my experience, it’s always better to get a pair that work in tandem. That way you avoid any personality clashes. The best way to shoot food is via tethered shooting. Tethered shooting allows you to connect your camera to a screen or tablet for instant viewing of the images as you’re taking them. This allows everyone involved in the process to see the RAW images as they are taken. This means the food stylist can go in and clean up an area, remove greens that have gone limp, or simply rearrange the food.
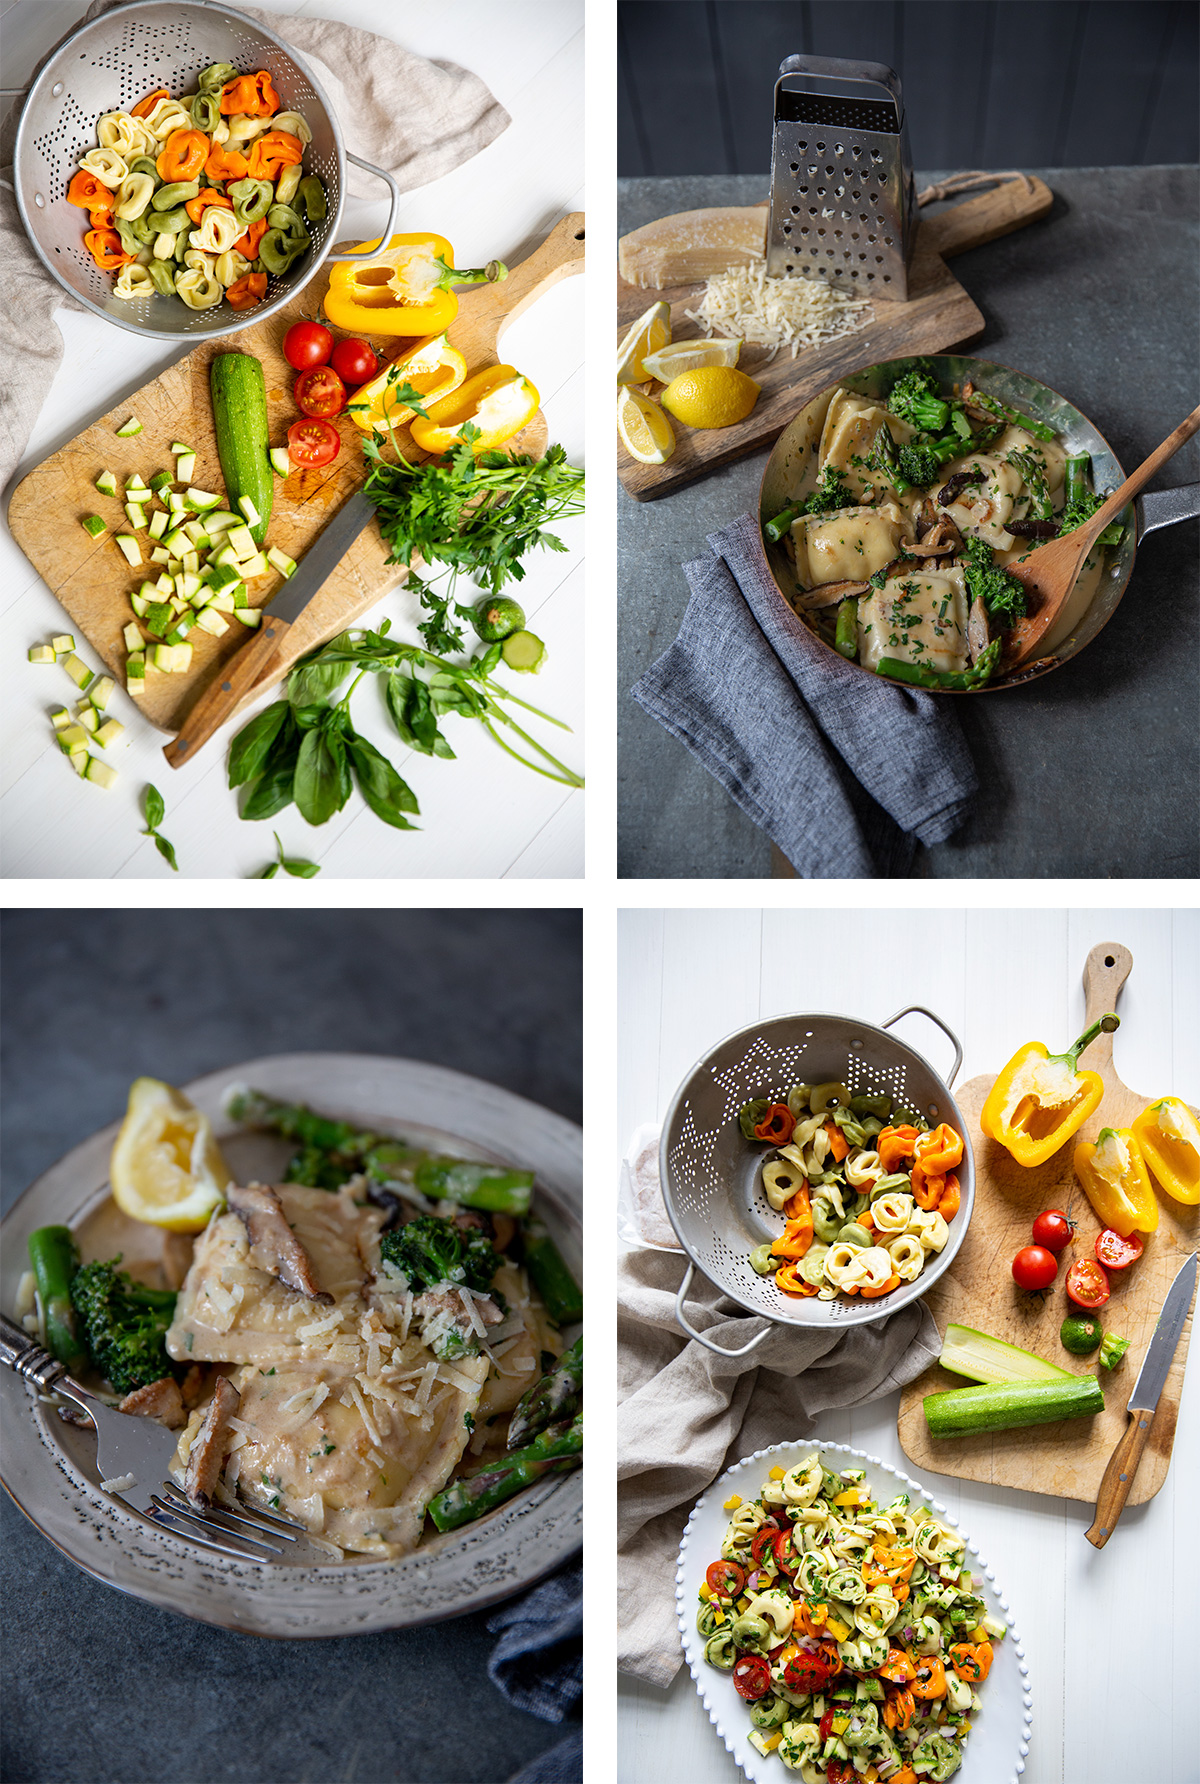
In food photography, there tend to be a couple of angles that are considered popular and safe. The first and most popular being the “flat lay,” where you place the camera above your subject and shoot straight down. Another option is the 45-degree angle, which is just above table height. This lets you get a good angle on your shot, and build layers/tiers within the frame. They say terrible things happen in threes, well I’m here to tell you that’s the opposite in food photography. When utilizing elements, read anything but your main dish, within your frame keep in mind that three tends to be the magic number. These elements effectively let you balance out the frame while keeping the focus on your main object. For example if you have a dish that has strawberries in it, try not to use more than three strawberries within your frame. You want to show your viewers what is in the food, but not take away from the main focal point of the image.
Lastly, when introducing a human element to your images, make whatever actions they do feel justified. Use it as a litmus test and ask yourself, is this how someone would serve pasta, is this how they would pick up that cherry. You want the model’s movements to feel as real as possible; otherwise, they will look staged. The key to working with your models is to make them comfortable in the role they are in. Get to know them, strike up conversation, and keep shooting. Another way to do this is to have your chef or stylist work with them a little bit. That way they can show them quick tips and tricks for how to do movements naturally.
The Editing Process
When it comes to editing food images, less is more. No matter what background, props, or elements you used. It’s up to you to uphold the integrity of the food. Don’t mess with the color. Uphold what food looks like, by playing with its saturation or HSL you run the risk of making food unappetizing.
You also want to create a balanced exposure, and this can mean a variety of things depending on the mood you set for your shoot. You may have to dial back your exposure because you used a darker background and want the food to pop. Or on the other hand, you shot with natural light and have to make sure the exposure on the left side of the image is the same as the right. There is no right or wrong way to go about this. Unlike other shoots much of your contrast and complementary elements should have been picked out in the preproduction phase when you are selecting the atmosphere you want to create.
Conclusion
It always goes back to the connection we have with food. Compositions should feel natural and spaces lived in. Understandably, that feels dishonest given how manufactured and meticulous the layout of food images are. Keep in mind you have the creative control, you’re the one telling the story, do your best to make sure it’s representative of you.
Keeping all of this in mind, the world of food photography is crowded and noisy. It takes a lot of prep work, patience, and experimenting to find a style that’s your own. The key is to represent food in the best way you know how. Let your own experience and relationship with food guide you to what feels natural, and your work will emulate that in return. And of course, always remember, “Proper planning and preparation prevents piss poor performance.”
Looking to elevate your marketing campaigns with compelling visuals?
Fill out the form below to schedule a free strategy call with our team.